Key Takeaways
Magnum selection is a technical decision that links needle geometry with skin response, saturation, and application speed.
- Standard, curved, weaved, and stacked magnums distribute pigment differently.
- Codes 0403, 0405, and 0407 identify common three-, five-, and seven-round groupings; gauge still needs separate attention.
- A 04 gauge behaves differently from 06 or 08, especially when taper and hand speed change.
- Voltage, movement, and needle hang must be adjusted together rather than in isolation.
- Sterility, cartridge integrity, documentation, and controlled passes are part of professional shading technique.
Choose the right magnum configuration for the shading task
Magnum tattoo needles for shading are not interchangeable simply because they share the same broad layout. The grouping, edge shape, pin spacing, and artist’s movement all affect how pigment enters the skin. A useful starting point is to identify whether the task demands coverage, a soft transition, dense packing, or controlled texture before choosing a cartridge.
Standard magnums for broad, consistent coverage
A standard magnum uses two aligned rows with a comparatively straight working edge. It can cover large areas efficiently and is useful when the design calls for firm, even application rather than a feathered perimeter. The flatter edge also requires careful angle control, since the outside pins can leave a more apparent boundary when the hand slows or pivots.
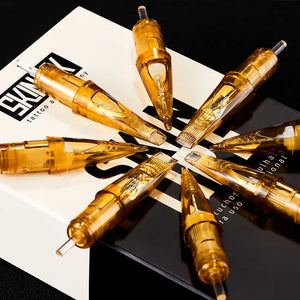
For large fills, Skin Ink Magnum Cartridges are documented for large coverage, intense shading, and broad fillings, with a configuration intended for even ink distribution. That description makes them relevant when the priority is consistent coverage, not a promise that one cartridge will suit every skin type or machine.
Curved magnums for softer edge control
Curved, round, or soft-edge magnums use an arched pin arrangement that reduces the abrupt corners found on a flat grouping. The result can be a gentler transition at the edge of a pass, especially during pendulum or sweeping work. They still require disciplined overlap; a curved edge does not correct excessive pressure or repeated passes.
The curved formation is particularly useful in gradients and black-and-grey transitions. A curved magnum reference can help artists compare arched formations, long tapers, and medium tapers without treating those variables as identical.
Weaved and stacked magnums for density and saturation
Weaved magnums stagger the pins so the contact points are distributed across the working width, while stacked magnums place the rows more densely. Weaved layouts can offer a balanced blend of coverage and softness; stacked layouts tend to favor concentrated pigment deposition and firm packing. The trade-off is that dense configurations can punish the skin quickly if the artist compensates for resistance by pressing harder.
The choice should follow pigment behavior and the intended value. A dense configuration may reduce the number of passes, but fewer passes are only beneficial when the first pass is controlled and the skin remains receptive.
Comparing needle groupings by skin response and application speed
Grouping size changes both the footprint of each pass and the amount of feedback transmitted through the machine. Larger groupings can move faster across open areas, while smaller groupings let the artist turn, taper, and stop with more precision. The same nominal configuration can behave differently with a different taper, gauge, machine stroke, or client’s skin.
| Configuration | Primary advantage | Main trade-off | Typical use |
|---|---|---|---|
| Standard magnum | Broad, direct coverage | More visible edge potential | Large fills and firm shading |
| Curved magnum | Softer edge behavior | Still needs careful overlap | Gradients and blended transitions |
| Weaved magnum | Balanced spread and texture | Can require measured passes | Soft packing and mixed values |
| Stacked magnum | High density and saturation | Higher trauma risk if overworked | Dense color or black packing |
The table is a starting framework, not a substitute for testing on practice material and observing live skin. Artists should select the grouping that reaches the desired value with the fewest controlled passes, then refine speed and depth rather than forcing the cartridge to perform outside its strengths.
Match needle size and taper to the desired result
Needle count, diameter, and taper interact, so size labels should never be read in isolation. Codes such as 0403, 0405, and 0407 describe common round groupings, while gauge terms such as 04, 06, and 08 describe pin diameter. A compact 04 grouping with a long taper may produce a very different mark from a 06 grouping with a short taper, even when both are used for shading.
Small magnums for detail work and tight transitions
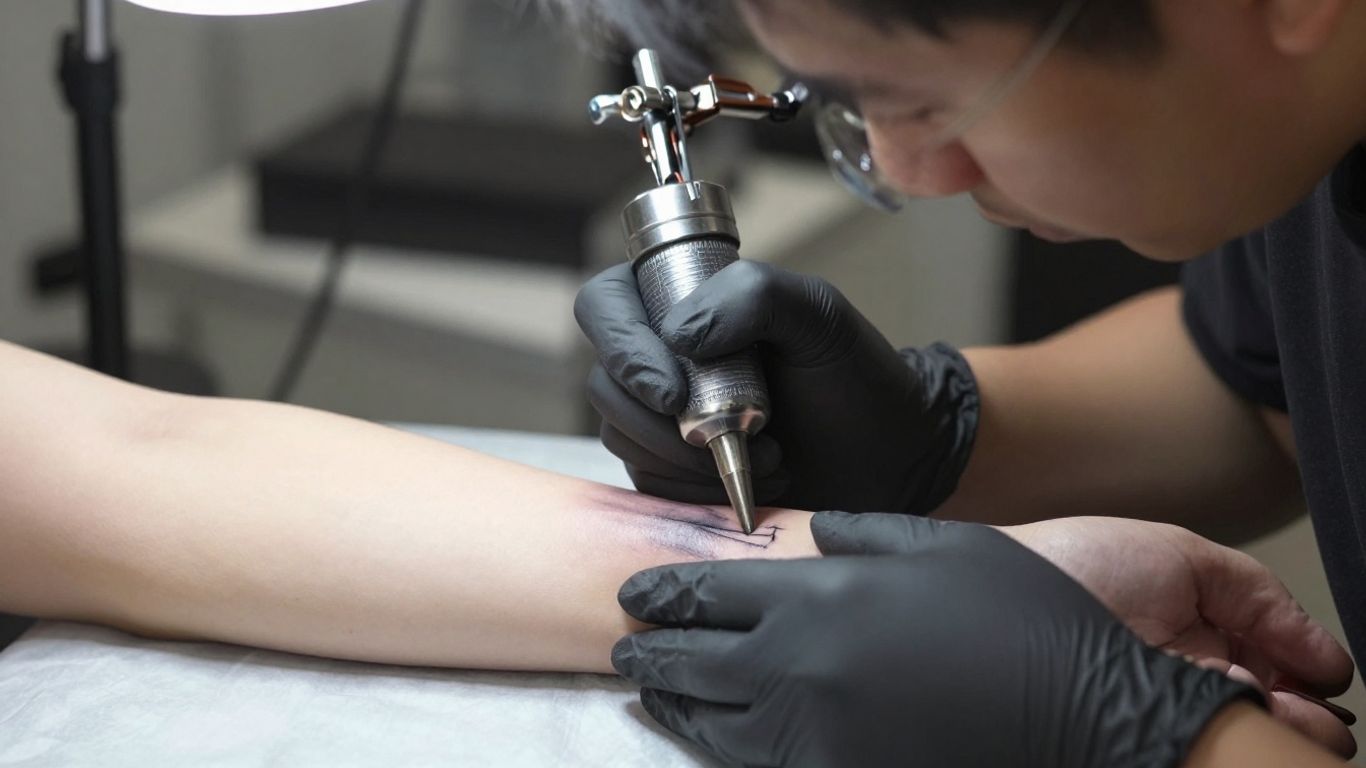
Small magnums are practical where a broad needle would obscure the value structure or make a transition difficult to place. They can build small gradients, facial planes, and narrow areas without forcing the artist to turn a large grouping into a detail tool. Their smaller footprint, however, makes patchiness more visible if the passes are uneven.
A small magnum should be moved with enough consistency to distribute pigment across its full width. Short, hesitant strokes often create repeated tracks rather than a continuous tone.
Large magnums for smooth gradients and background coverage
Large magnums reduce the number of adjacent passes needed for backgrounds and expansive blends. Their width helps maintain a consistent visual rhythm, but the artist must keep the surface angle stable and avoid crowding curves that the grouping cannot follow cleanly. Large configurations are efficient only when the working area is sufficiently open.
Big Magnum Round cartridges from Skin Ink USA are documented in configurations from 35 to 49 needles and for large-scale tattooing, including blackout, oriental, and realism styles. Those stated applications describe where the product is positioned; they do not remove the need to assess skin response during the procedure.
Short, medium, and long tapers in shading applications
A short taper exposes more needle diameter near the point and generally produces a fuller, more immediate contact pattern. Medium tapers sit between direct saturation and gradual deposition, while long tapers can support finer, more gradual marks when the artist controls hand speed carefully. Taper changes the feel of the pass as much as needle count does.
For artists comparing curved configurations, a #8 bugpin long taper and a #10 standard medium taper are useful examples of how diameter and taper can be specified together. The artist should record the complete configuration rather than writing only “magnum” in a setup note.
How needle diameter affects pigment flow and trauma
A 04 gauge has a smaller pin diameter than 06 or 08, which affects the visual delicacy of the mark, pigment loading, and the amount of tissue contacted per pin. Smaller diameter does not automatically mean safer, and larger diameter does not automatically mean harsher; pressure, dwell time, speed, and repeated passes remain decisive. Skin feedback matters more than labels when the artist is judging whether to continue.
Diameter should therefore be matched to the required saturation and the client’s skin condition. If redness rises rapidly or the surface becomes swollen and resistant, the correct response is usually to reassess technique and stop overworking rather than simply changing voltage.
Understand how needle configuration changes shading behavior
A magnum’s shape determines how pigment is carried, released, and blended across the skin. It also affects wipe-back, edge visibility, and the amount of overlap needed to hide individual passes. Artists who understand these mechanical differences can choose a configuration for a specific visual result instead of relying on a favorite grouping for every task.
Ink capacity and saturation across different magnum layouts
Two rows give a magnum a wider pigment footprint than a small round shader, while spacing and density determine how quickly that footprint becomes opaque. Weaved layouts can leave a softer distribution, and stacked layouts can place more pigment into a concentrated zone. Ink capacity is useful only when the artist can control the release and prevent pooling.
The correct test is the value achieved after a measured pass and wipe, not how much ink appears to sit on the needle. Excess surface ink can disguise gaps until the area is cleaned.
Edge performance and the risk of unintended lines
Straight-edged magnums can create a visible line when the outer pins catch at the end of a stroke or when the cartridge is tilted too far. Curved edges reduce that abrupt corner, but they do not make the grouping immune to banding. The artist should lift, taper, or change direction deliberately rather than stopping under pressure.
A round shader may be preferable where an organic edge or thicker, controlled mark is required. Round Shader Cartridges are documented for well-pigmented fills, gradients, artistic textures, and subtle shading, with a circular grouping and slight spacing for fluid ink flow.
Overlap patterns for smooth, even passes
Overlap should be planned according to the width and edge profile of the grouping. A consistent partial overlap blends adjacent passes, while random changes in angle create alternating dark and light bands. Artists should keep the wrist, machine angle, and stroke rhythm stable long enough to see how the skin is accepting the pigment.
A practical sequence is:
- Establish the lightest value with a controlled first pass.
- Wipe fully enough to inspect the actual pigment distribution.
- Repeat with measured overlap rather than tracing every visible gap.
- Stop when the target value is reached or the skin begins to lose receptivity.
This sequence protects the transition from becoming muddy. It also gives the artist a clear point at which to move to another area instead of repeatedly correcting a pass that was too aggressive.
When a round shader may outperform a magnum
A round shader can outperform a magnum in tight spaces, small organic details, and areas where a wide edge would be difficult to turn. Its circular contact pattern can make local fills and textured shading easier to control. A magnum remains more efficient for broad surfaces, but efficiency is not the same as suitability.
The design should decide the tool. Switching to a smaller round shader is often more precise than trying to manipulate a large magnum with excessive tilt or pressure.
Set up voltage, hand speed, and needle depth
Voltage, hand speed, and needle depth form one operating system. Changing one without considering the other two can turn a smooth configuration into a patchy or traumatic one. Machine manufacturer limits, stroke characteristics, skin condition, pigment viscosity, and cartridge stability all belong in the setup decision.

Balancing machine voltage with needle grouping
A larger or denser grouping may need a machine setting that maintains stable movement under load, but higher voltage is not a shortcut to saturation. The artist should make small adjustments while observing sound, hand resistance, needle return, and skin response. Universal fit describes compatibility with many machines; it does not mean every machine drives every cartridge identically.
Cartridge guidance on machine and needle integration is useful for reviewing gauge, housing, voltage, and needle hang together. The practical setting remains machine-specific and should be confirmed before working on a client.
Adjusting hand speed for smooth pigment deposition
Hand speed controls how long each pin contacts a point in the skin. A slow hand with high voltage can overwork quickly, while a fast hand with insufficient deposition can leave a pale, uneven field. The artist should build rhythm from short test passes and then maintain that rhythm across comparable areas.
Pendulum and whip motions can be widened or shortened, but their speed should not change abruptly at the edge. A gradual lift produces a cleaner value transition than an abrupt stop.
Controlling needle depth without overworking the skin
Needle hang and actual penetration are separate considerations: the visible hang sets a working range, while hand pressure and machine movement determine what reaches the skin. Too little depth can produce weak retention and excessive surface ink; too much can cause trauma, swelling, and blurred edges. Depth should be judged by pigment placement and skin response, not by a fixed visual number.
The artist should keep the cartridge stable, use light consistent pressure, and avoid chasing every small gap immediately. Skin that is already swollen will not provide a reliable surface for fine correction.
Using whip, pendulum, and packing motions
Whip shading tapers away from a denser start, pendulum shading builds a controlled transition through repeated arcs, and packing motions place pigment more directly. Each motion needs a matching grouping and value plan. A curved magnum often suits broad pendulum work, while a smaller grouping may offer better control at a tapered end.
The motion should remain intentional from entry to lift. Randomly combining techniques in one small area is a common cause of visible texture and uneven saturation.
Use magnum needles for specific tattoo styles
Style influences the desired value structure, saturation, and edge quality, but it does not eliminate the need for a technical setup. Black-and-grey realism usually asks for controlled transitions, while traditional color work may prioritize dense, even packing. The best cartridge is the one that supports the intended mark without forcing unnecessary passes.
Black-and-grey realism and soft-value transitions
Realism depends on gradual value changes and edges that appear only where the design requires them. Curved magnums and long tapers can help the artist soften a transition, provided the motion remains even and the pigment is not deposited too heavily at the start of each pass. Smaller groupings are useful when the planes become narrow.
The artist should assess the value after wiping, because surface ink can make a soft transition look darker and more complete than it is. Controlled restraint usually produces a cleaner healed result than trying to finish every value in one aggressive pass.
Color realism and high-density saturation
Color realism often requires both smooth blends and areas of reliable saturation. A magnum can move pigment efficiently across open shapes, but dense packing should be separated from blending so the artist can control each transition. Pigment viscosity and wipe technique can change how a grouping behaves from one color to another.
The working plan should leave room for the skin to settle between passes. A saturated appearance during the session is not proof that the area has been placed evenly.
Traditional and neo-traditional packing
Traditional and neo-traditional work commonly benefits from decisive fills, strong color fields, and intentional edges. A denser magnum can reduce the number of passes, while a curved configuration may help soften the edge where the design transitions into a gradient or background. The artist should still protect the outer boundary with a controlled angle.
Magnum Round Cartridges are documented as having a two-row curved needle configuration for controlled skin contact and minimal trauma, with applications including realism, black-and-grey, and gradient effects. The stated product capability supports those uses, but technique remains the deciding factor in actual skin response.
Background shading and large-area blends
Background work rewards a grouping that can cover efficiently without leaving a repeated stripe pattern. Large magnums are useful on open surfaces, while a smaller curved magnum may be better near focal details and irregular contours. The transition between tools should be planned so that one configuration does not leave an obvious change in texture.
Artists should work in coherent sections, wipe and inspect each section, then blend the joins while the value remains controllable. This is faster and more predictable than moving randomly around a large design.
Troubleshoot common shading problems
Shading problems usually come from a mismatch among grouping, movement, depth, and skin condition rather than from one isolated fault. Diagnosis should begin with a clean wipe and a pause to inspect the surface. The artist should avoid correcting a technical problem by adding pressure, speed, or repeated passes without a clear reason.
Patchy saturation and inconsistent coverage
Patchiness can result from insufficient overlap, inconsistent hand speed, inadequate depth, or a grouping that is too large for the contour. A measured second pass may correct a genuine gap, but repeated passes over the entire area can create trauma while leaving the original pattern intact. The artist should compare the light and dark zones after wiping.
If the cartridge is carrying pigment unevenly, the artist should check the needle grouping, ink consistency, machine movement, and cartridge stability before continuing. A consistent process is easier to repair than a hurried one.
Harsh edges and visible banding
Harsh edges often appear when a straight magnum is stopped abruptly, tilted excessively, or moved at inconsistent speed. Banding may also reflect poor overlap or a change in voltage midway through the section. Curved magnums can soften the edge behavior, but they cannot replace a controlled lift and consistent wrist position.
The correction is usually to soften the transition from the lighter side with a cleaner, lighter motion. Darkening the entire band tends to make the defect more permanent.
Excessive trauma, redness, and skin swelling
Redness is expected during tattooing, but rapidly increasing swelling, excessive tenderness, or a surface that becomes unusually resistant should be treated as a warning to reassess. Common contributors include too much pressure, excessive dwell time, high effective impact, or too many passes. A smaller grouping is not automatically gentler if it is used aggressively.
The artist should pause, wipe, allow the area to settle briefly, and decide whether the target can be reached without further damage. Client comfort and tissue condition take priority over completing a value immediately.
Ink loss, pooling, and poor wipe-back
Ink loss can reflect insufficient depth, poor skin contact, an unstable cartridge, or a motion that is too fast for the selected grouping. Pooling can come from excessive loading, slow movement, or fluid that remains on the surface rather than entering evenly. Poor wipe-back makes both conditions harder to distinguish.
The artist should use a controlled amount of ink, wipe with a consistent method, and inspect the cartridge tip for damage or obstruction. If the problem persists, replacing the cartridge is safer than compensating with pressure.
Apply professional hygiene and quality-control practices
Technical performance begins with a sterile, compatible cartridge and a clean workflow. Professional artists and PMU specialists should verify packaging, needle integrity, membrane function, machine compatibility, and local regulatory expectations before the procedure. In Brazil-facing workflows, ANVISA requirements should be checked against the applicable product and facility rules rather than assumed from a general cartridge label.
Selecting sterile, compatible magnum cartridges
A cartridge should be individually packaged, within its use-by date, and compatible with the machine’s connection system. Universal fit can simplify purchasing, but the artist still needs to confirm stable seating, appropriate needle hang, and reliable movement on the actual machine. A cartridge that fits physically but vibrates or shifts is not a suitable cartridge for controlled shading.
Documentation for Big Magnum Round cartridges describes an advanced sealing system, durable polycarbonate body, and compatibility with leading machine brands. These are product-specific features; the artist should still inspect every cartridge before use.
Verifying membranes, needle integrity, and packaging
The package should be intact, dry, and free of signs that sterility may have been compromised. After opening, the artist should inspect the needle grouping for bent pins, uneven soldering, debris, or an irregular edge. A membrane should prevent backflow during normal use, but it does not excuse poor barrier practice or reuse.
Photographs taken during actual use are more informative for internal quality review than stock images. The cartridge should be visible in those records, along with the configuration and the machine setup.
Preventing cross-contamination during shading
Barrier protection should cover the machine, cable, work surface, and any controls that may be touched during the procedure. Single-use items must be discarded correctly, and clean and contaminated zones should remain distinct. The artist should change gloves whenever a contaminated object is touched before returning to the client or sterile supplies.
A supply audit may also document unrelated studio purchasing references such as pacifier materials, tape selection, third-shot technique, wine pairing, and bed-bug treatment; those links are not tattoo guidance, but separating reference categories prevents accidental substitution of general purchasing information for regulatory or clinical requirements. For tattoo-specific configuration background, this needle configuration guide is the relevant internal reference.
Documenting needle choices and repeatable settings
A useful record includes cartridge code, gauge, taper, machine, voltage range, needle hang, pigment family, motion, skin response, and the number of passes. Codes 0403, 0405, and 0407 should be recorded exactly, alongside whether the pins are 04, 06, or 08 gauge. That level of detail makes a successful setup repeatable without pretending that identical settings will suit every client.
The record should also note what did not work. Over time, these observations help the artist select configurations by evidence, reduce unnecessary experimentation, and maintain a consistent hygiene and quality-control standard.

Conclusion
Selecting magnum tattoo needles for shading is a process of matching geometry, diameter, taper, motion, and machine behavior to the skin and the design. The most reliable results come from controlled passes, honest observation, sterile equipment, and records detailed enough to reproduce good decisions without treating them as universal formulas.
Frequently Asked Questions
What is a magnum tattoo needle used for?
A magnum is generally used for shading, color packing, gradients, and broad fills because its two-row layout covers more surface than a small round grouping.
What is the difference between a standard and curved magnum?
A standard magnum has a comparatively straight working edge, while a curved magnum uses an arched edge that can produce softer perimeter behavior during blending.
Are smaller magnums better for detail?
They can be better suited to narrow transitions and compact details because their smaller footprint is easier to place, but they may require more precise overlap to avoid patchiness.
What do 04, 06, and 08 mean in tattoo needles?
These gauge terms describe needle diameter. The diameter affects contact, pigment flow, and mark character, but pressure, depth, taper, and hand speed also determine the result.
How should an artist choose between 0403, 0405, and 0407?
Those codes commonly indicate three-, five-, and seven-pin round groupings. The choice should follow the intended footprint, detail level, and saturation rather than the code alone.
Can a magnum cause more skin trauma?
Any configuration can cause excessive trauma when used too deeply, too slowly, with excessive pressure, or through too many passes. Needle shape does not replace careful observation of the skin.
How can shading banding be reduced?
Consistent hand speed, stable machine angle, measured overlap, controlled lifting, and complete wipe-back help reveal and prevent banding before the area is overworked.